After seeing this video I decided to make a 555 timer circuit on paper using a cutting machine and adhesive copper sheets. It worked out pretty well, although getting the machine to cut traces this small was tricky.
Here is the overall workflow I used:
- Create circuit layout in Kicad
- Print copper traces to PDF then crop image, remove background, and save to PNG
- Import PNG to Silhouette Studio and cut out on adhesive copper sheet
- Transfer the copper traces to the final location
- Solder components on
Tools & Supplies
- Cutting Machine – I used a Silhouette Portrait but any cutting machine should work fine.
- Cutting Machine Supplies – Blade, cutting mat, transfer paper
- Copper sheets – I used these from Amazon.
- PCB Design Software – I used Kicad.
- Image Software – I used Affinity Photo, GIMP should also work fine.
- Silhouette Studio software
- Something to put the circuit on – I used a page in a small notebook
- Circuit components – I used surface mount 0805 resistors, capacitors, & LED as well as a 555 timer SOIC package.
- Soldering Supplies – Iron, solder, etc…
Steps
Circuit Design & PCB Layout
I used Kicad to layout this simple 555 timer-based astable multivibrator circuit.

And then laid out the copper traces like this
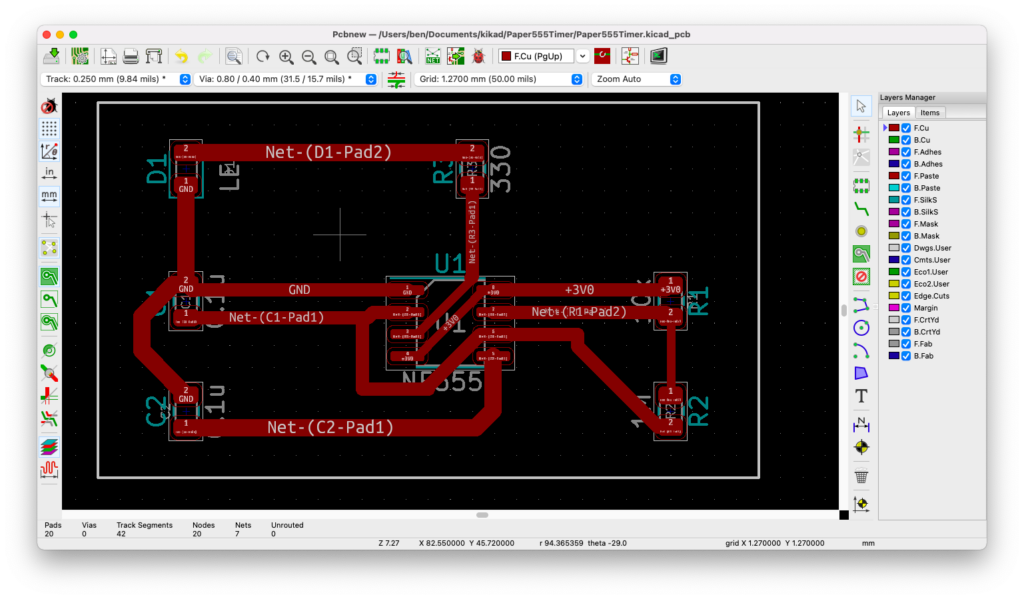
I put all of the traces on one layer so that I wouldn’t have to mess with manually aligning and overlaying layers. I made the traces thick because the machine had a hard time cutting traces less than 0.75mm wide without pulling it up from the backing paper. If I were to do this again I would also fill the inside corners of the traces more to make it easier for the machine to cut out.
Export File
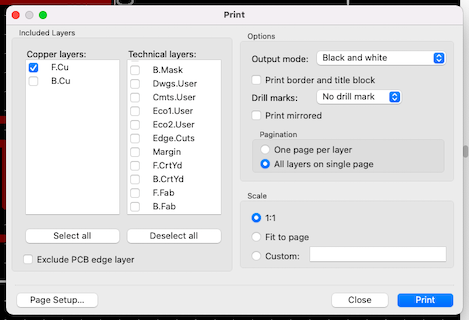
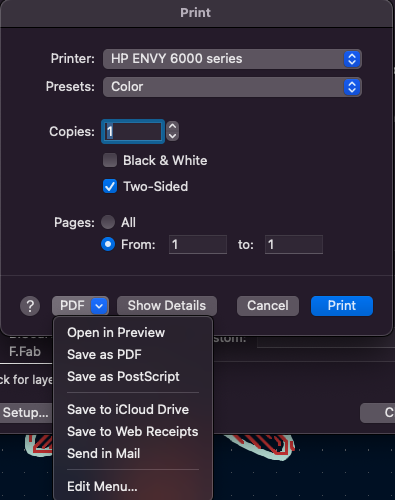
Kicad doesn’t export the traces to a format that Silhouette Studio can import. The best way I found is to print the copper traces to PDF. First go to File -> Print… and then in the dialog box select only the copper layer you need (F.Cu in my case) without any of the technical layers. Then click Print and save it to PDF.
On Mac OS, you can open directly in Preview and save as a PNG. Make sure to save with the alpha channel so that the background stays transparent.
Cut It Out
In Silhouette Studio I imported the PNG and placed the traces on the cutting area.

I set up the machine with my adhesive copper sheets. In the Send tab, I picked the slowest speed, shallowest blade depth, and least amount of force. This is because I had several failed attempts at cutting the traces where the blade actually tore up the foil or lifted the small traces off of the backing paper. A newer machine or sharper blade would probably also help with this process.
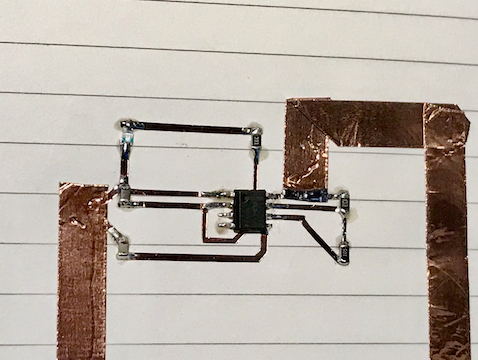
After a successful cut, I used transfer paper to pull the copper off of its backing. I removed the extra copper from the transfer paper with tweezers. Then I laid the traces on the transfer paper down onto paper and rubbed it down hard before carefully peeling away the transfer paper.

Soldering Components
I soldered the components on without any trouble beyond normal SMD soldering difficulties. I was careful to avoid touching the iron tip to the paper as much as I could help it. My iron was set to about 300 C and the paper didn’t show any kind of burn marks.

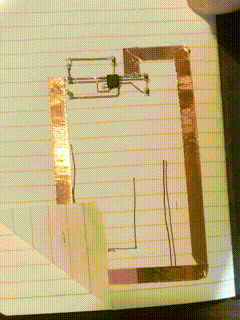
For the power lines to the battery I didn’t lay out traces in Kicad. Instead, I ran them manually afterward with a roll of 1/4 inch copper tape. I soldered the connection from the copper tape to the other trace to make sure it had a solid connection.
Conclusion
The circuit functions well and was relatively simple to produce. I may use this technique again for circuits that are simple and don’t require traces less than 0.75 mm in width. This could be especially useful for applying an electrical circuit on something other than traditional PCB material like a greeting card.
I don’t know how well this circuit will hold up over time, though I would probably try to coat it with something to protect it if I really wanted to make it last.