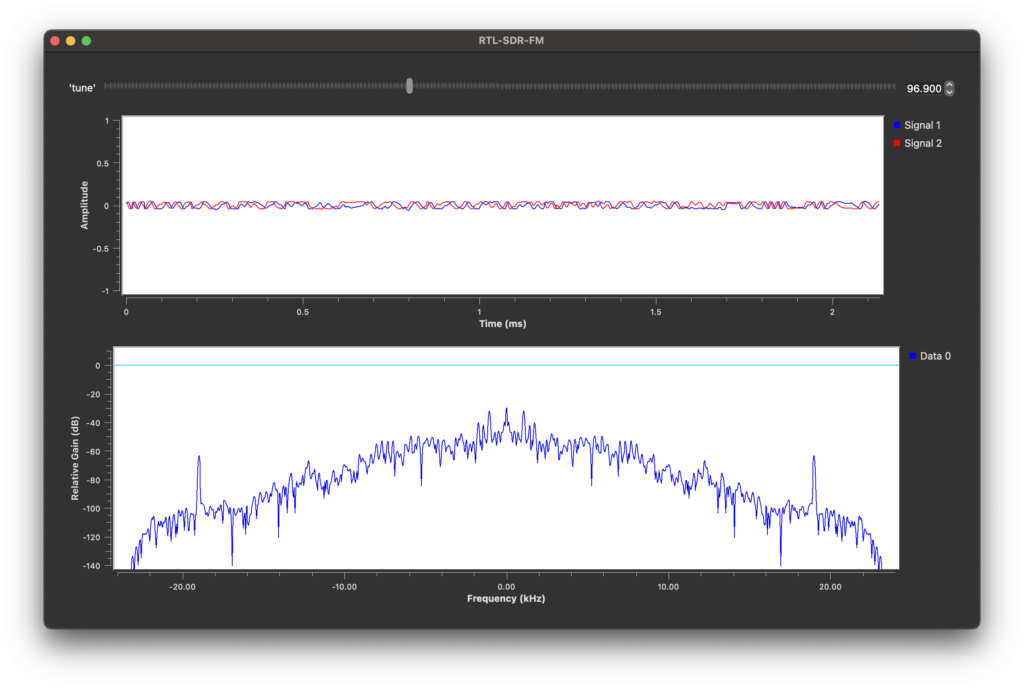
This project uses GNU Radio Companion to generate python code from a flow graph that plays FM radio stations using an RTL-SDR. The screenshot shows it tuned to WRSA Mis 96.9, along with the demodulated FM signal. I’m working on Mac OS, but GNU Radio is also well supported on Linux and Windows.
Purchase RTL-SDR (Amazon Link, not affiliated)
The project largely follows this video tutorial https://www.youtube.com/watch?v=tj_9p_rXULM. I don’t get into all of the details covered in the video, so it is worth watching if you have the time.
The flow graph I used in GNU Radio Companion is shown below. The main components are:
- Soapy RTL-SDR Source: Gets sampled data from the RTL SDR
- Low Pass Filter: Filters out unwanted signals from other radio stations
- WBFM Receive: Demodulates the FM signal into the audio signal
- Audio Sink: Plays the audio signal
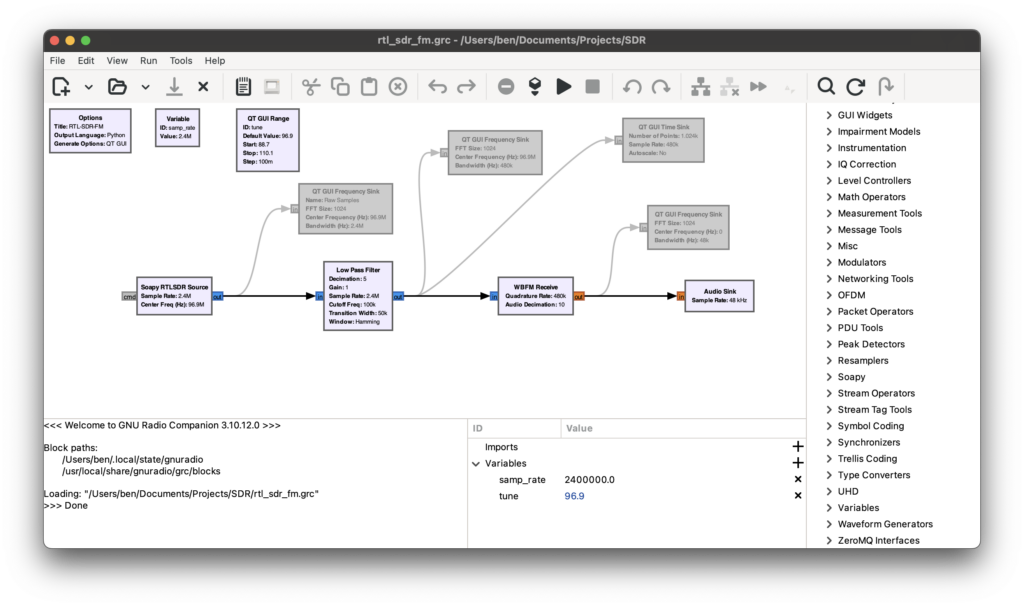
The GUI blocks are disabled in the screenshot. The radio will work without them, but they are useful for seeing what the signal looks like at different stages of processing.
Clicking the play button in GNU Radio companion will being playing the FM radio station over my computer speakers. Under the hood, GNU Radio Companion generate and runs a python script. The script can also be run manually with
/usr/local/Cellar/gnuradio/3.10.12.0_8/libexec/venv/bin/python rtl_sdr_fm.pyInstall GNU Radio (Mac)
There are a lot of ways to install GNU Radio (https://wiki.gnuradio.org/index.php/InstallingGR)… almost too many. On Mac, I had a good experience using Homebrew.
brew install gnuradioOnce installed, you can run the GNU Radio Companion from a terminal with:
gnuradio-companionThis installs a python interpreter specifically for running GNU Radio. For some reason, GNU Radio python interpreter did not include the Matplotlib library which is required for running the QT GUI blocks. I was able to install it with this command.
/usr/local/Cellar/gnuradio/3.10.12.0_8/libexec/venv/bin/python -m pip install matplotlibCreate the RM Radio Flowgraph
When you open GNU Radio Companion it will look something like this with a new flowgraph that is blank except for an “Options” block and a variable block for a variable called “samp_rate” which is set to 32K. Variable blocks allow you to define a variable once and use it throughout the flowraph. Note that the name “samp_rate” isn’t special, it’s just a variable name that you can use in other blocks. On it’s own, it does nothing important.

You can add processing blocks from the list on the right side. Open the search bar with ⌘ + F (Ctrl + F on Lin/Win).
Add The Source Block
The first processing block needed is a source block. This connects to the SDR hardware and gets the sampled data. I used the “Soapy RTLSDR Source” which came with the Homebrew install. To add it to the flowgraph either double-click it or drag it onto the flowgraph.
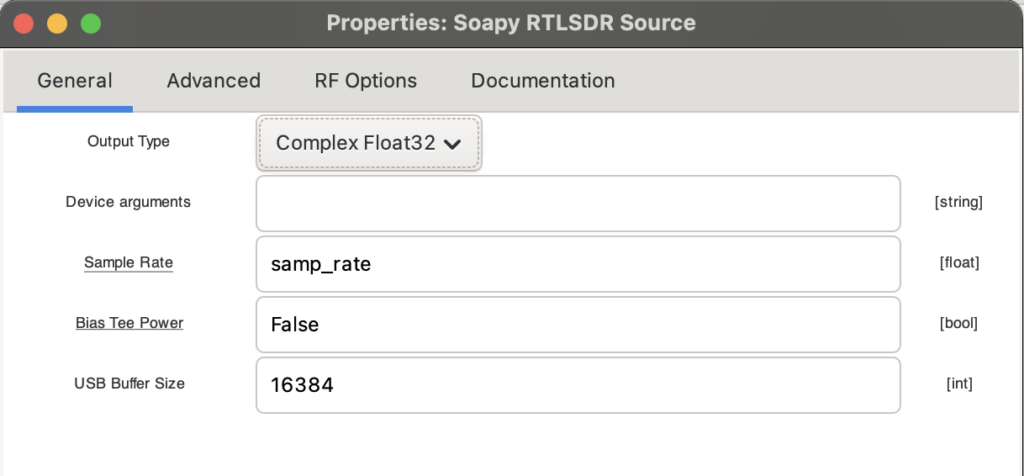
The Soapy RTL SDR Source block defaults to using the variable “samp_rate” for the sample rate. I double-clicked the samp_rate variable block to change it to “2.4e6”.
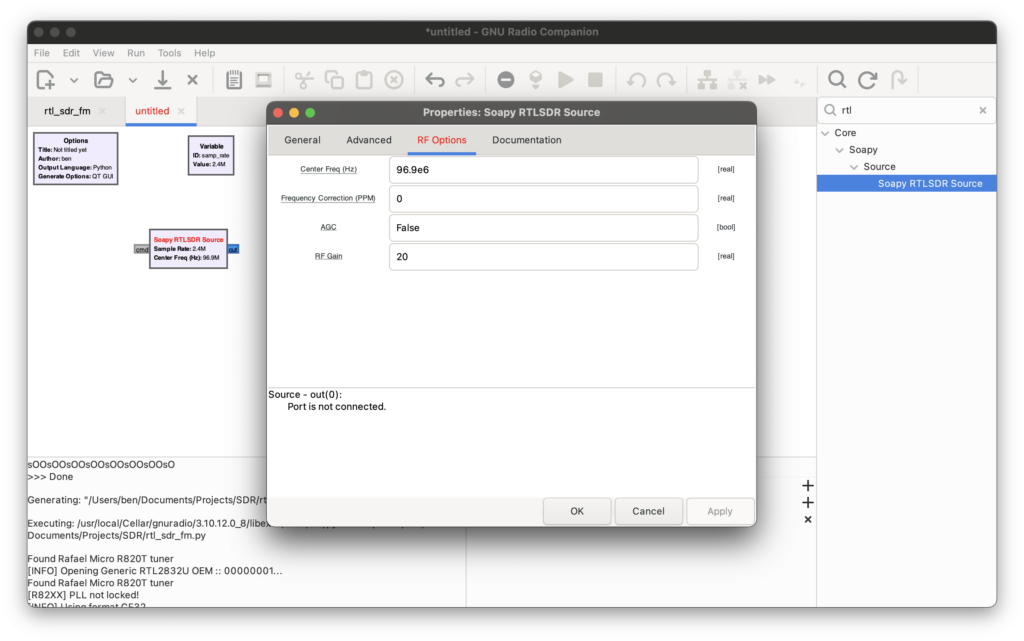
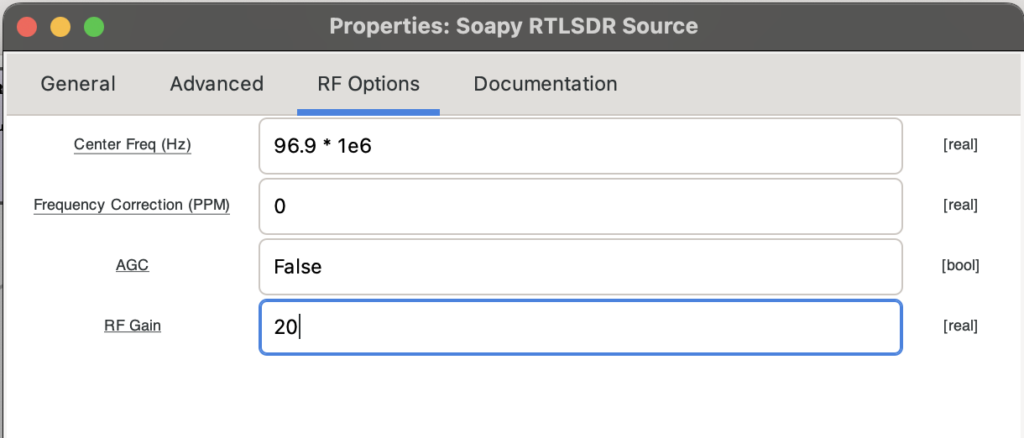
I double-clicked on the Soapy RTLSDR Source block to open its properties box. In the “RF Options” tab, I set the center frequency to a local FM radio station, “96.9e6”. This will work for any FM radio station. Just use the usual radio station number and add “e6” to specify that it is in MHz.
Add The Other Blocks
The rest of the blocks are added in a similar way, by searching for them by name and then double-clicking or by dragging them onto the flowgraph
They are connected together by clicking on the “out” of on block and dragging it to the “in” of another block.

The rest of the blocks are configured as follows.
Soapy RTL SDR Source
General Tab
RF Options Tab
Low Pass Filter

WBFM Receive (Wideband FM Demodulator)

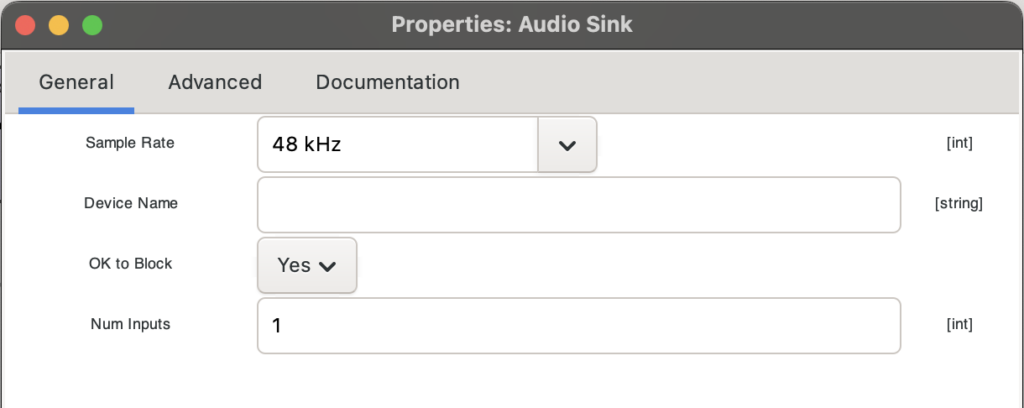
Audio Sink
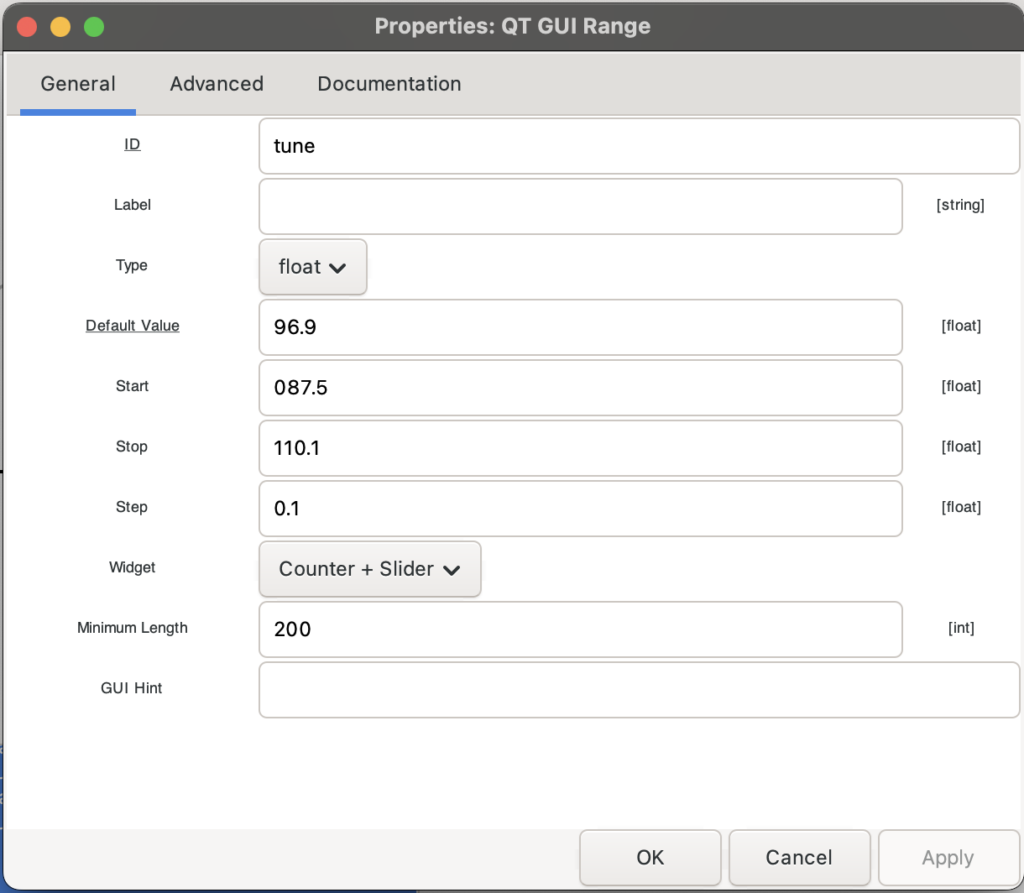
Adding the Tuner
I made the radio tunable to different stations while running by adding a QT GUI Range block with the following parameters. After this, a GUI comes up when running which has a slider bar to tune the station.

Sample Rate
The sample rate from the RTL SDR is 2.4e6 samples/second. The WBFM Receive block decimates with a factor of 50 meaning that only 1 sample in 50 is kept. This puts the demodulated audio sample rate down at 2.4e6 / 50 = 48e3. This is why the Audio sync sample rate is set to 48KHz.
Missing XTerm Executable Error
I got this error when I first running my project “Warning: missing xterm executable”. However, it does not seem to actually cause any issues and seems safe to ignore.
