The Wemos D1 ESP8266 board is a good little board with a few quirks to note when working with Arduino. Here are my notes on it.
The main things to note are:
- You must put the board into program mode before uploading code. This is done by resetting the board while pin D3 is pulled low.
- The built-in LED uses inverted logic; LOW for on and HIGH for off.
- In the Arduino code, you must use the letter “D” in front of the pin numbers, otherwise the pins map differently than the pin labels. Example:
#define FRONT_LED_PIN   D1
#define BACK_LED_PIN    D4
#define LED_COUNT       22

Adafruit_NeoPixel front_strip(LED_COUNT, FRONT_LED_PIN, NEO_GRB);
Adafruit_NeoPixel back_strip(LED_COUNT, BACK_LED_PIN, NEO_GRB);
Where I Purchased Boards
I purchased a couple of these boards from AliExpress https://www.aliexpress.us/item/3256804278544204.html (D1 ESP12F Micro option). They are currently priced at only about $1.50 + shipping. I usually wait until I have a large order to make the cost of shipping go further.
The model number printed on the ESP8266 is “ESP8266MOD”.
Programming With Arduino IDE
Install the ESP8266 Boards in Arduino IDE
First, add the ESP8266 board URL:
- Go to “File”-> “Preferences” and select the “Settings Tab”
- Copy and paste the following URL into the “Additional Boards manager URLs.
- https://arduino.esp8266.com/stable/package_esp8266com_index.json
- Click “OK”

Next, install the ESP32 boards
- Click on the Boards Manager icon
- Search for “ESP8266”
- Click “INSTALL” on the “esp8266 by ESP8266 Community”

Program the ESP8266 from Arduino IDE
Plug in the board to your computer with a USB cable.
Make sure the USB cable carries data and not just power. It’s a good idea to label them.

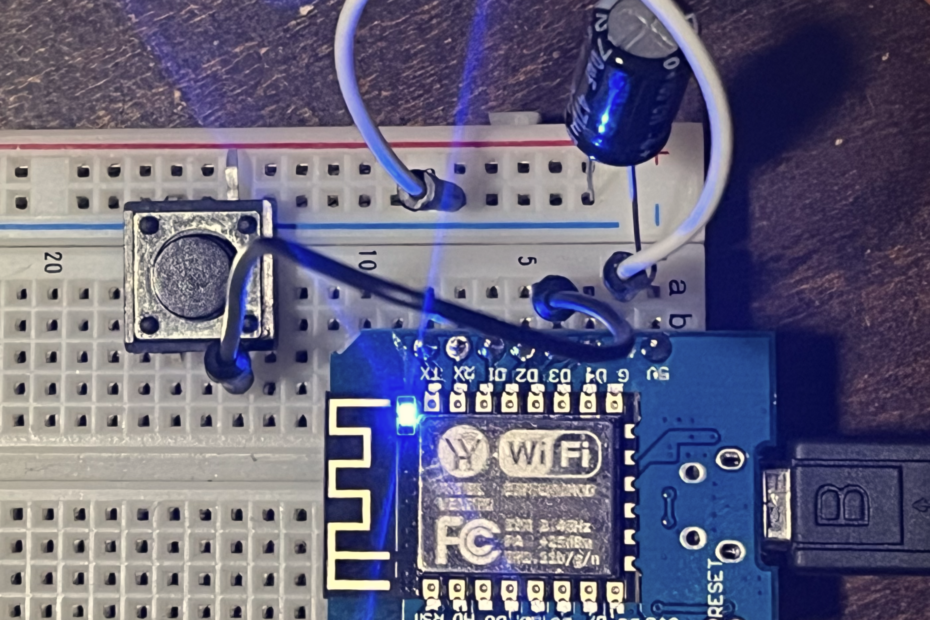
Set the Wemos D1 to program mode by grounding pin D3 and hitting the reset button.
Here is a breadboard configuration to easily set program mode. Holding down the black button (bottom right) grounds the D3 pin. The Wemos D1 reset button can be seen in the top left.

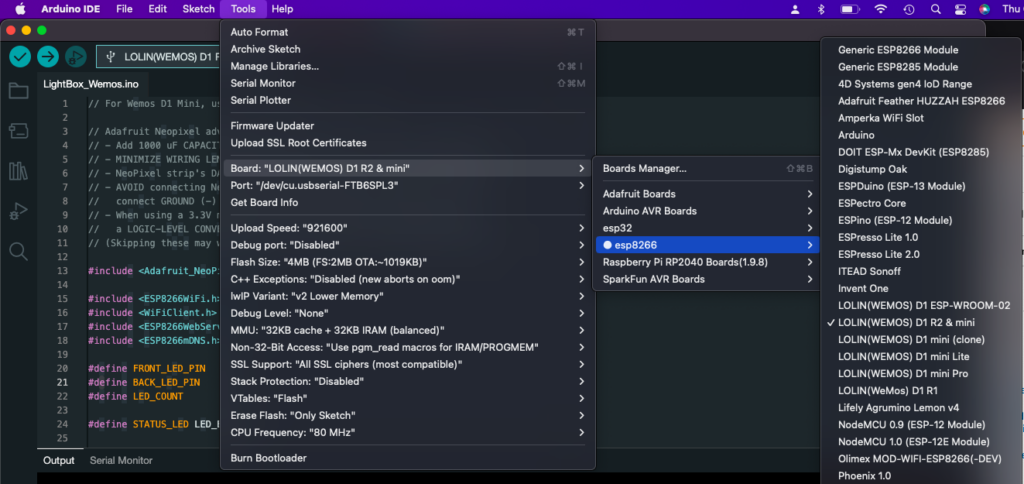
Select the board by going to “Tools” -> “Board” -> “esp8266” -> “LOLIN(WEMOS) D1 R2 & mini”

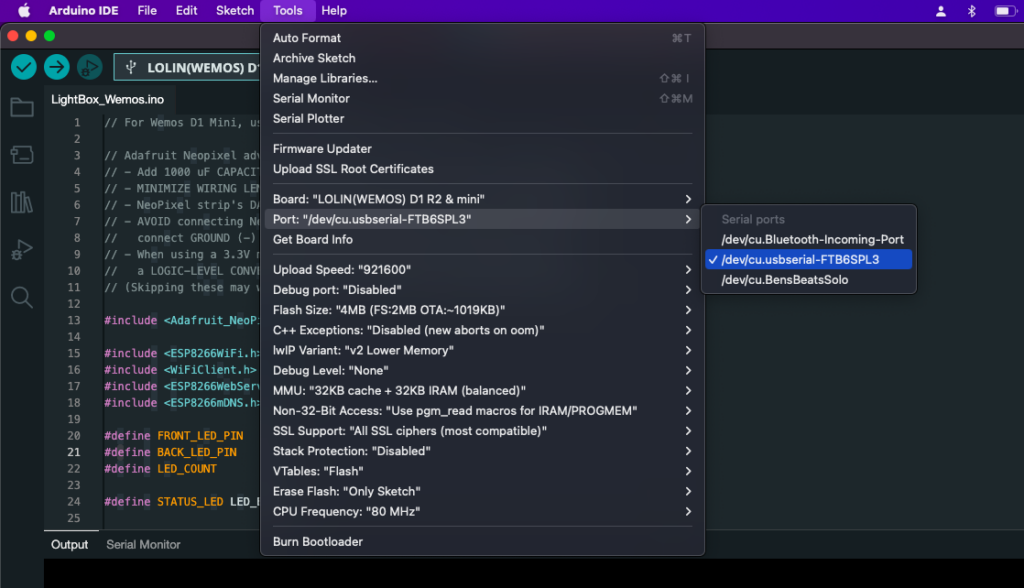
Select the port by going to “Tools” -> “Port” and select the appropriate port. On Mac OS or Linux it will be something like /dev/cu.* or /dev/tty.*. On Windows it will be a COM port.

Compile your sketch, or pick an example sketch to use. You can always start basic with the classic Blink.ino sketch (“File” -> “Examples” -> “01.Basics” -> “Blink”). Once you have a sketch to compile, click the “Verify” button (checkmark symbol) in the top left of the Arduino IDE to compile. If successful, it will output stats of the compiled program.
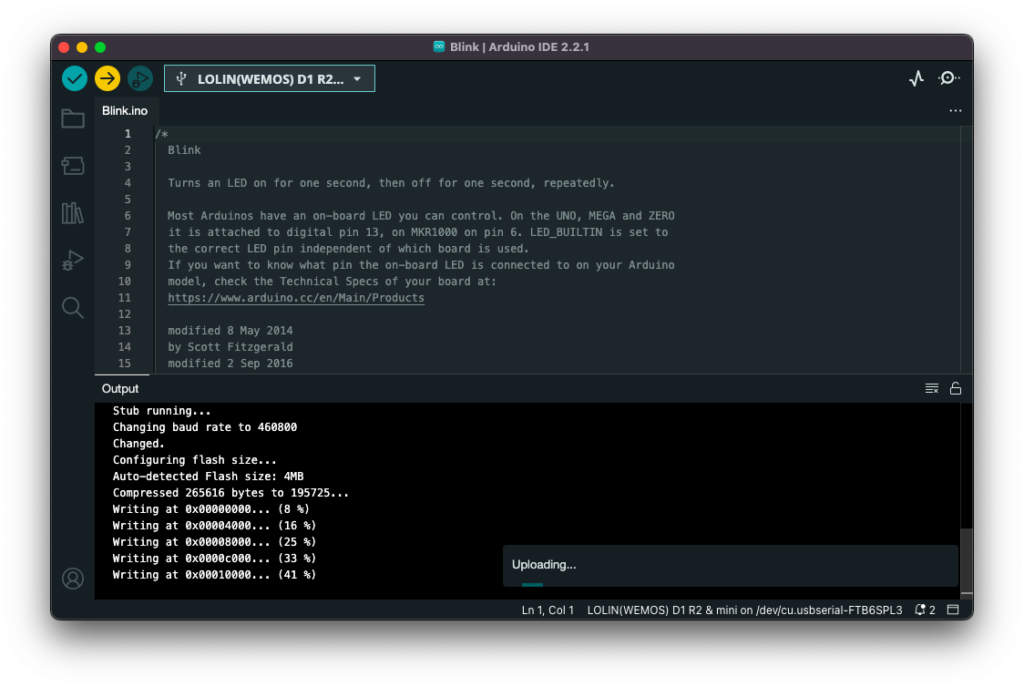
Once compilation is successful, you are ready to upload the code. If you haven’t already done so, put the board in program mode now. To upload the code, click the “Upload” button (arrow symbol).

When it is done uploading successfully you will see something like this.
Wrote 265616 bytes (195725 compressed) at 0x00000000 in 4.8 seconds (effective 441.1 kbit/s)...
Hash of data verified.

Leaving...
Hard resetting via RTS pin...
If the output is failing to connect to the board, then it is not in program mode. Try pulling pin D3 low and resetting the board again.
After successful upload you need to reset again with pin D3 left floating (disconnected). If you used the Blink sketch you should see the LED near the antenna blinking.

Note that the LED uses inverted logic; LOW is on and HIGH is off.
What to try next
There are many ESP8266 specific examples installed with the board files. You can find them under “File” -> “Examples” in the “Examples for LOLIN(WEMOS) D1 R2 & mini” section. I recommend “ESP8266WebServer” -> “HelloServer” as a good place to start.


