This may or may not be the best way to cut out a pinewood derby car. I’m sure this method could be improved upon but in the end it was used to cut out several successful cars.
My Setup
- Genmitsu 3018 CNC Router
- Autodesk Fusion 360 Software (Free personal license)
- 1/8 inch Straight Edged End Mill Router Bit
- Pinewood Derby Car Kit
- Typical pinewood derby car materials (sandpaper, paint, weights)
Sketch the design
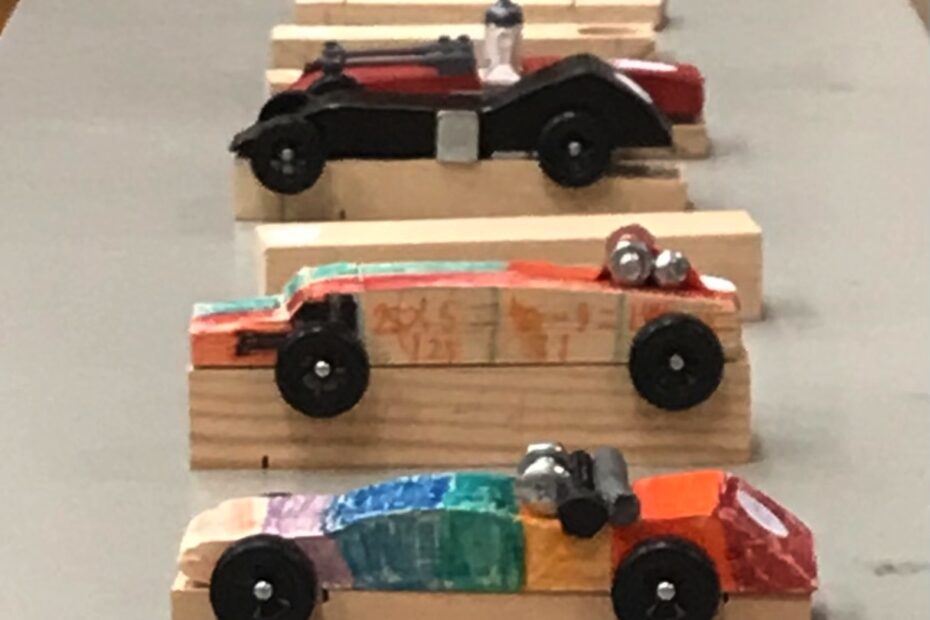
First, I had my kids sketch their designs, either on paper or the block of wood itself.

Fusion 360: Design
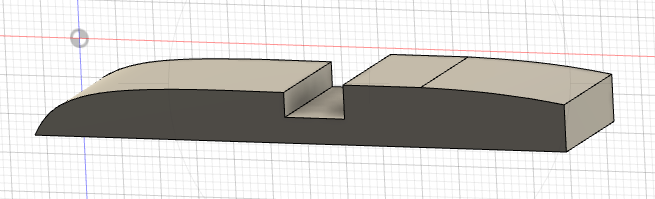
I used Fusion 360 to create a 3D model of the car. First, I created a block the size of the actual block of wood with “Create” -> “Box” (7 x 1.75 x 1.25 inches). I took a picture of the design and imported it into Fusion 360 with “Insert” -> “Canvas”. Then I traced over the design using the Sketch tool with “Create” -> “New Sketch”.

With the Sketch dividing the side of the block into two regions, I could select either the car body or the material to be removed. I selected the region to be removed, then extruded it until it was completely gone (“Create” -> “Extrude”).
Fusion 360: Manufacture
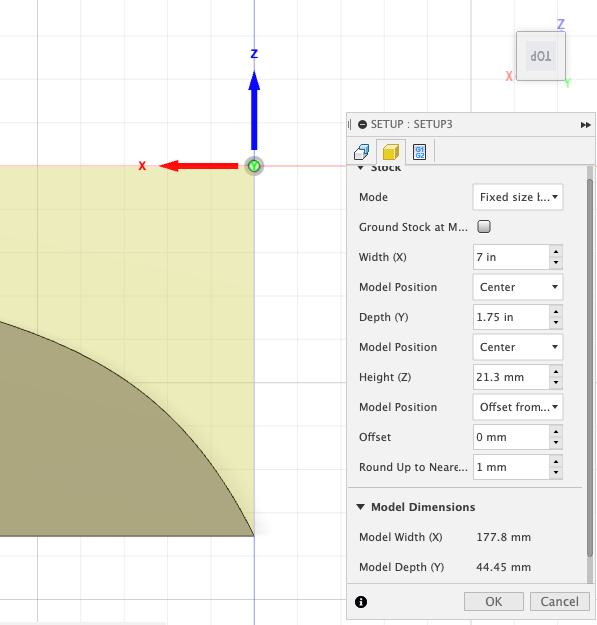
With the model done, it was time to create the code for my CNC machine to mill it. I switched Fusion 360 from the “Design” workspace to “Manufacture”. Then the next thing to do is create a setup with “Setup” -> “New Setup”. Then set the workspace orientation so that Z is pointing up, and X is along the length of the car. Also, define the Stock as a “Fixed Size Box” using the dimensions of the raw wood to be cut.
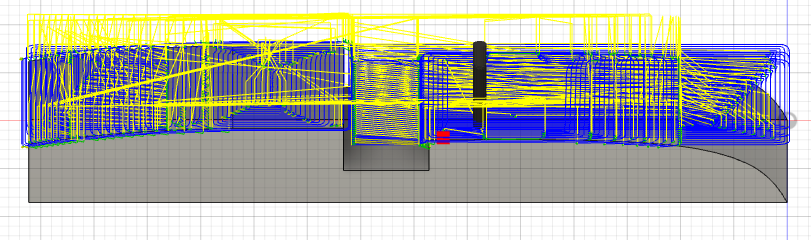
I chose to use adaptive clearing “3D” -> “Adaptive Clearing” which got the job done but left the car body pretty rough. I may try to find a better method to use next time. Here are the settings I used:
- Tool Tab
- Select/Create a tool
- Coolant: Disabled
- Spindle Speed 8000 rpm
- Geometry
- Disable Stock Contours
- Heights
- Clearance Height: 3mm above retract height
- RetractHeight: 4mm above Stock Top
- Passes
- Maximum Roughing Step-down: 2mm
- Linking
- Minimum Retraction
Then I simulated the path to see that everything looked okay.
Export G-Code
Next, I created a new NC program with “Setup” -> “Create NC Program”. In the window that popped up, I selected “Grbl/grbl” for Post, and set the file name & path. Under “Post Properties” in the “General” section for “Safe Retracts” I selected “Clearance Height”. Then I switched to the “Operations” tab and selected the operation that I had created called “Adaptive2”.
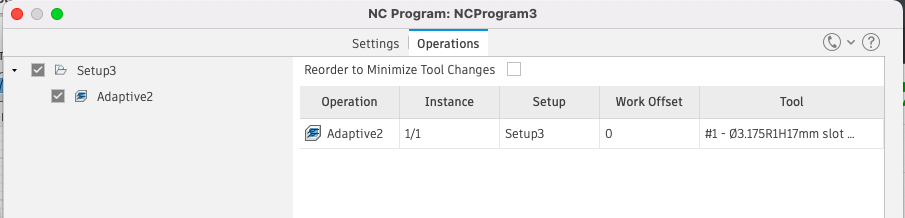
To create the file, I clicked the “Post” button at the bottom. Then I found the file that was created. It was a huge text file full of G-Code commands.

Milling
On my computer that is connected to the CNC, I opened up Candle then dragged & dropped the rebel_racer.nc file into it. I secured the raw wood block to the CNC platform with two sided tape as well as clamps that are lifted up by spare pencils. I jogged the CNC bit to the origin corner of the block and zeroed out all three axis. I also jogged the bit around after that to make sure that the movement of the actual CNC mill matched the motion in the Candle software display. After that I started the program by clicking “Send” in Candle and away it went milling out the car.
Nearly 2 hours later, this was the result.
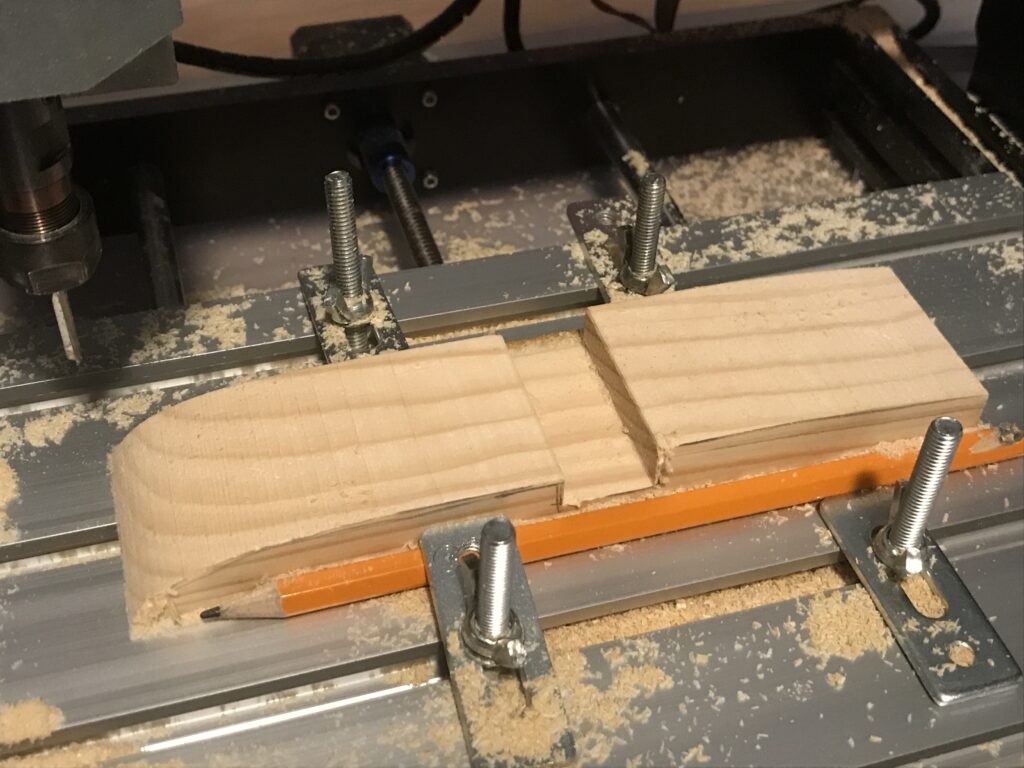
It took a good amount of sanding to smooth out the “stair-step” pattern left by the adaptive clearing method. I know the CNC is capable of doing a smoother job but I was happy with the result anyway. Plus this gave the kids a chance to get to know the sanding block. There was a bit of tear out on the edges but that was rounded later on with sandpaper anyway.
Tips
In Candle, it shows the path of the tip of the milling tool. This will go beyond the actual area of material to be removed.
Set the computer that is connected to the CNC so that it will not go to sleep before the milling job is completed.
Feel free to pause the milling job if there are any issues, or to clear away saw dust. Just be sure the milling bit is in the same location when you continue the job. That may include turning the drill back on if you had turned it off.